Message: What to Notify
The Message step defines what the notification says. There are two sub-steps: select the data fields you want to include, then write the notification text.
1. Select notification data
Choose which database fields to include in the notification payload. These become available as placeholders when writing the title and body.
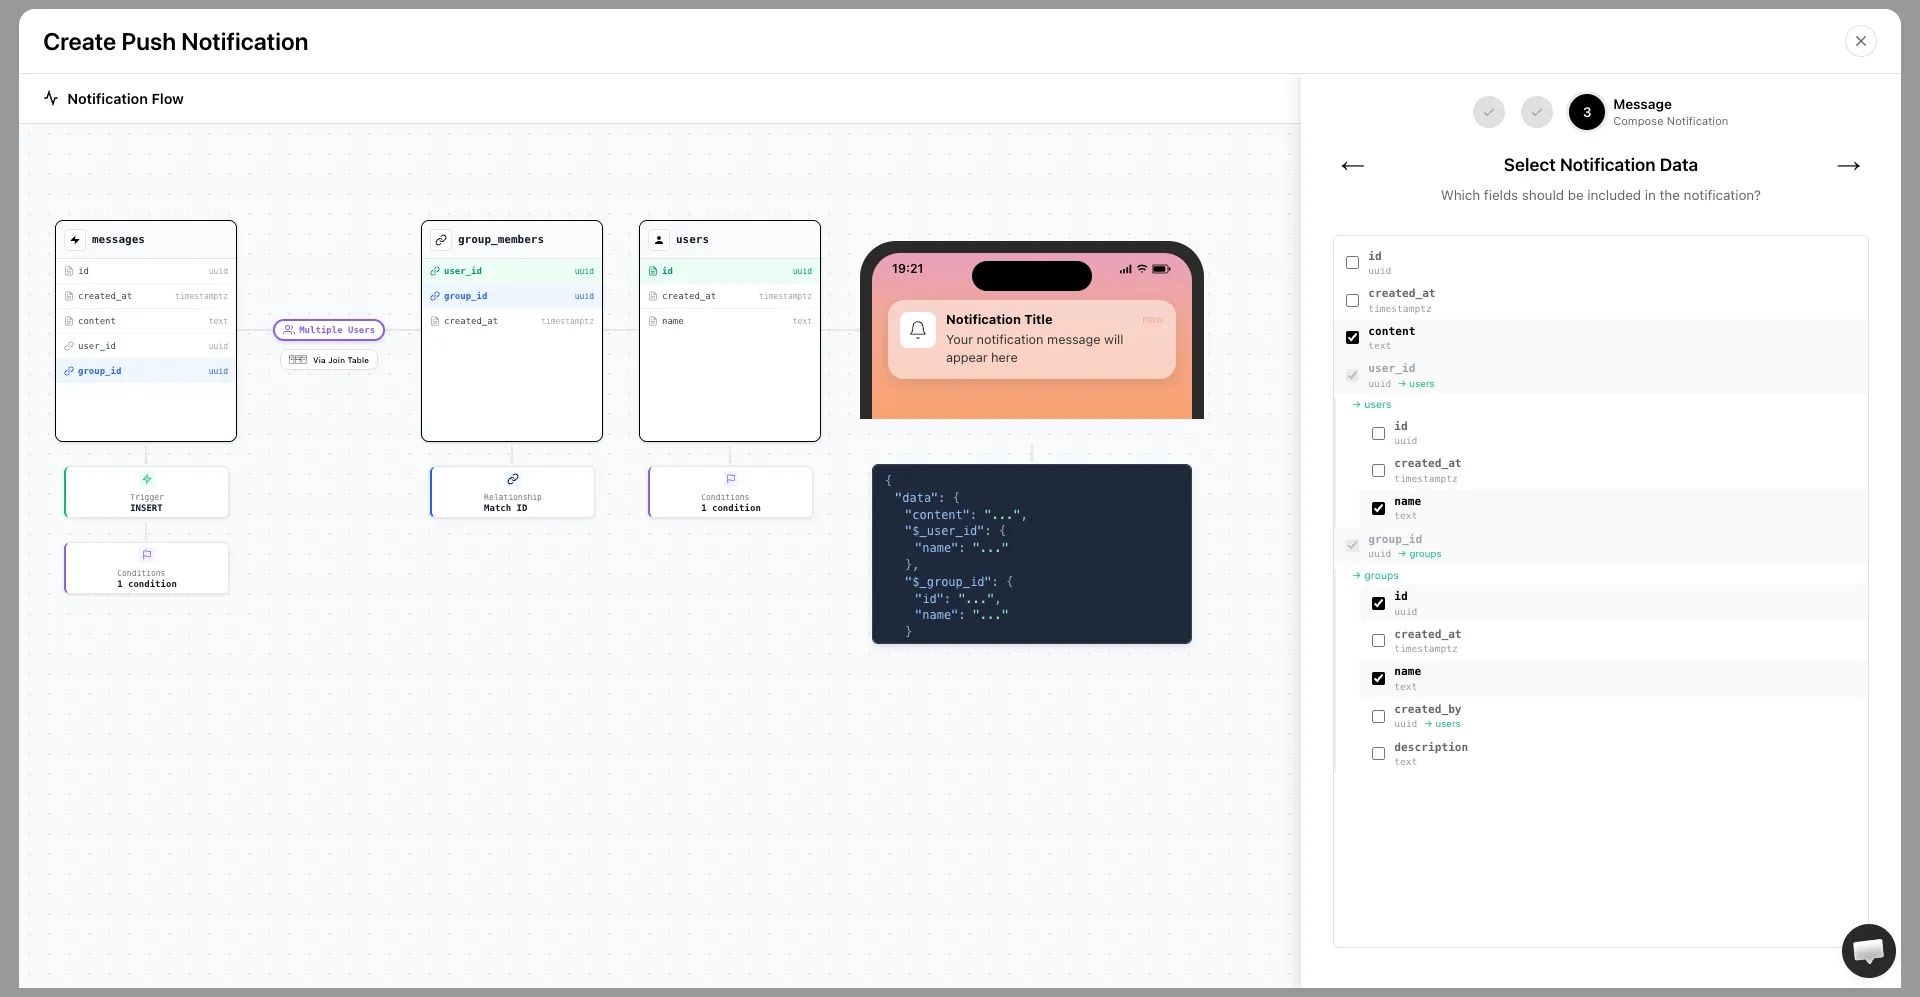
The list shows all columns from the trigger table. Foreign key columns expand to show columns from the related table as well. Check all the fields you want to reference in your message.
The live preview on the left updates to show a sample of the payload structure when the notification fires.
2. Write the notification
Write the title and body. To insert a live value from your selected fields, type {{ anywhere in the title or body. An autocomplete list of available placeholders will appear.
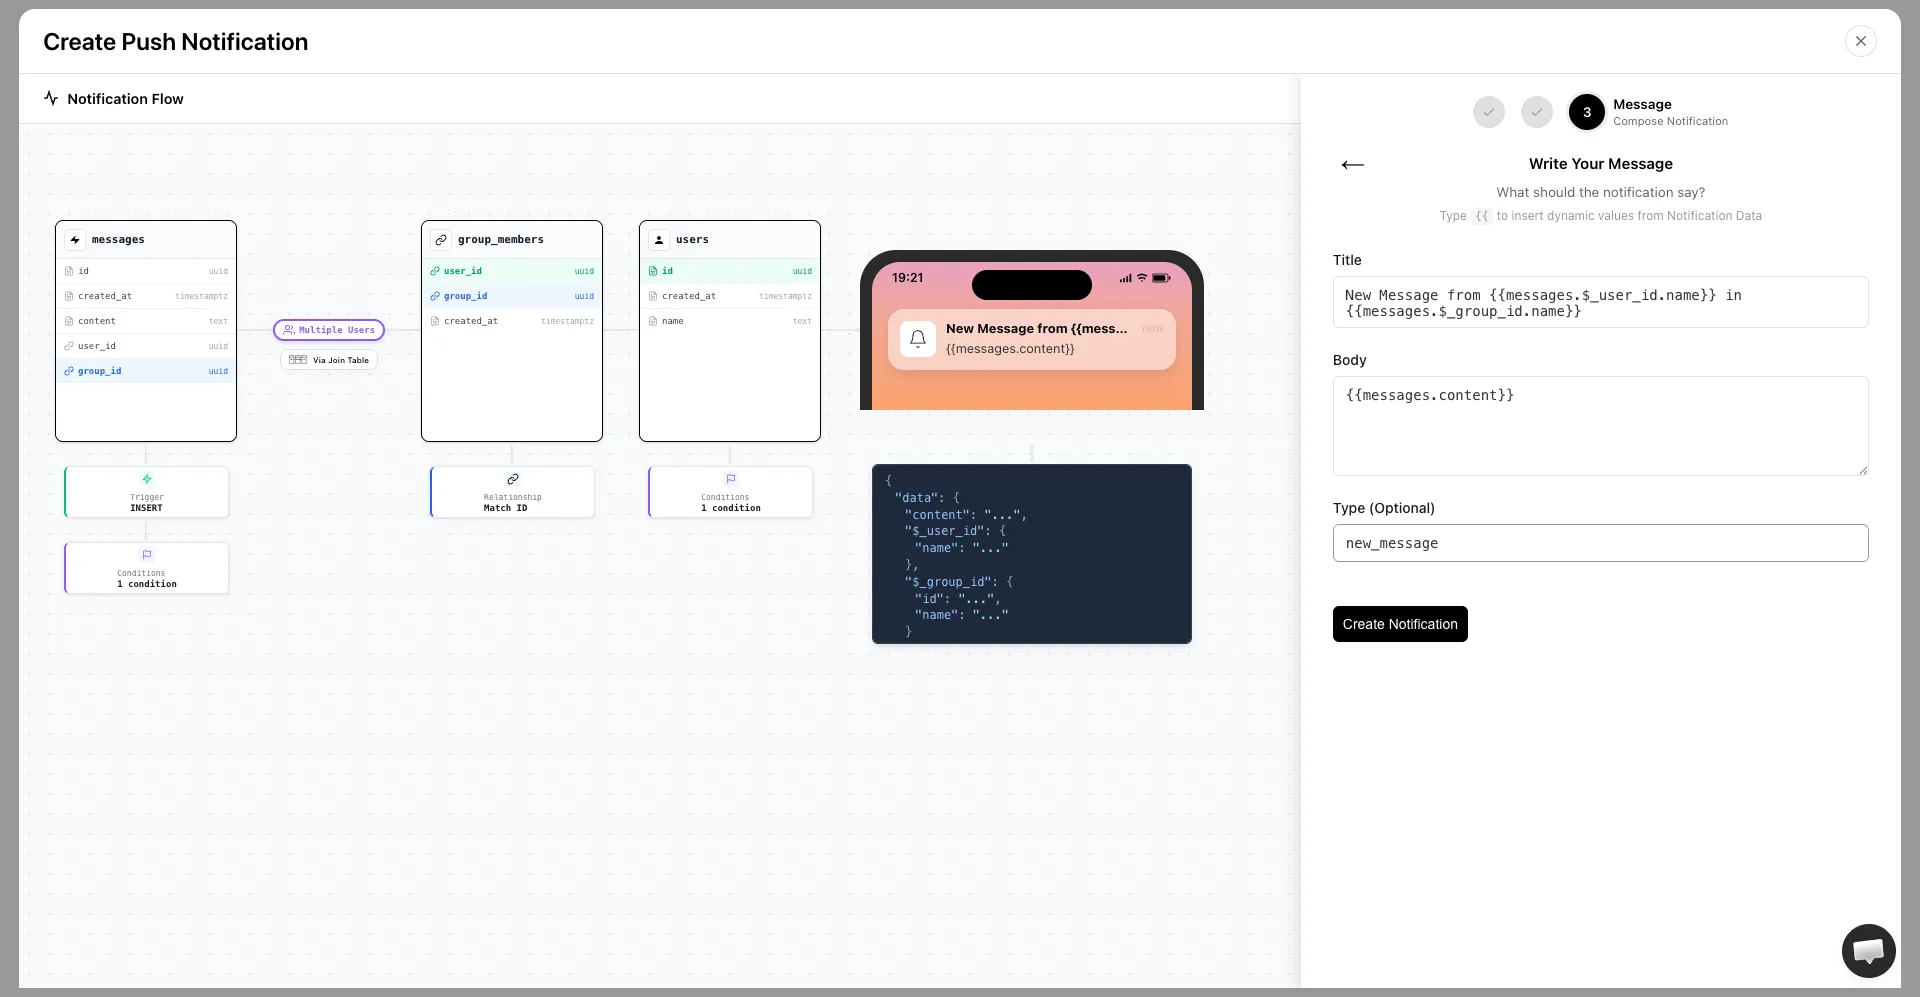
Placeholders use the format {{table.column}}. When the notification fires, each placeholder is replaced with the actual value from the row that caused the event.
Example title: New message from {{users.name}} in {{groups.name}}
Example body: {{messages.content}}
Type (optional)
Add a custom type identifier so your app can recognize and handle this notification:
- Example values:
new_message,order_update,friend_request - Access it in your SDK via
event.type - Use it to navigate users to a specific screen when they tap the notification
When you are happy with the message, click Create Notification. Entrig will create the database trigger on your Supabase project and the notification is live immediately.