Trigger: When to Notify
The Trigger step defines when a notification fires. There are three sub-steps.
1. Select a table
Pick the database table whose changes should trigger the notification. All tables in your connected Supabase project are listed here. Use the search bar to find yours quickly.
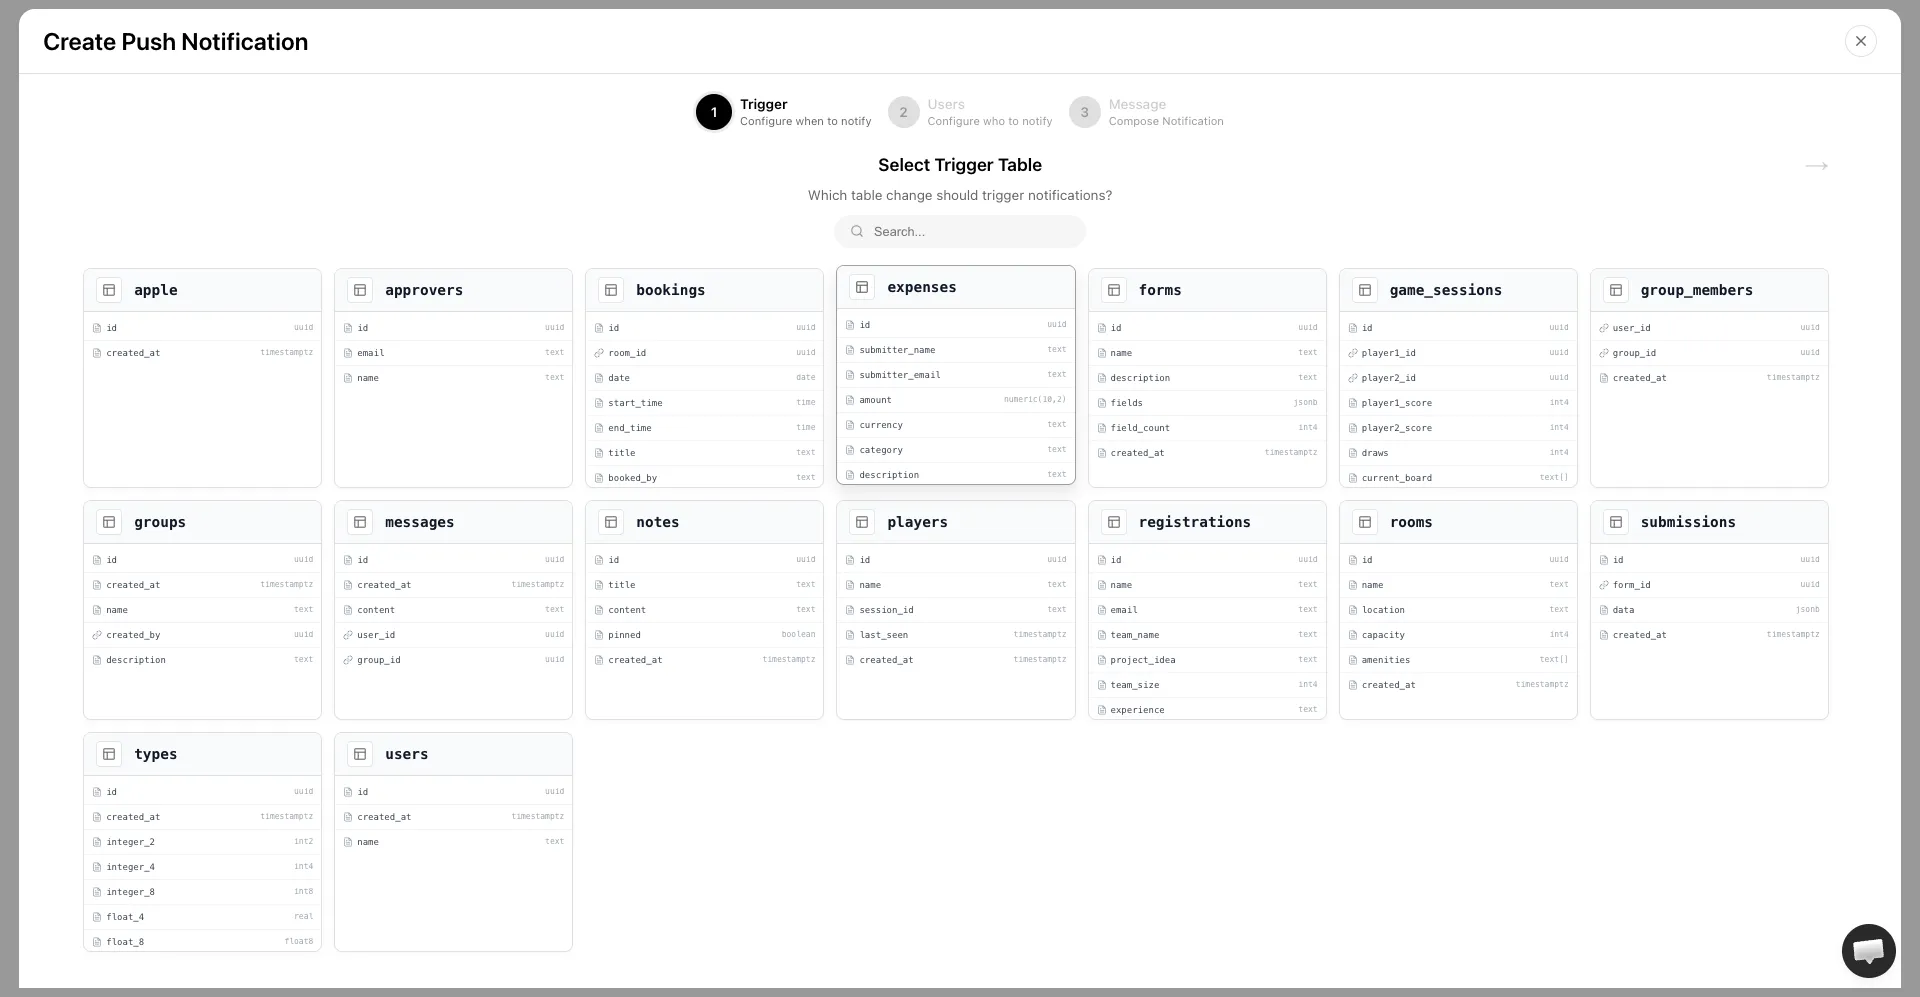
Pick the table that represents the activity you want to react to. For example:
messagesto notify when a new message is sentordersto notify when an order is placedbookingsto notify when a booking is created
Once you select a table, the live flow diagram appears on the left and updates as you configure the rest of the notification.
2. Select an event
Choose which database operation should fire the notification.
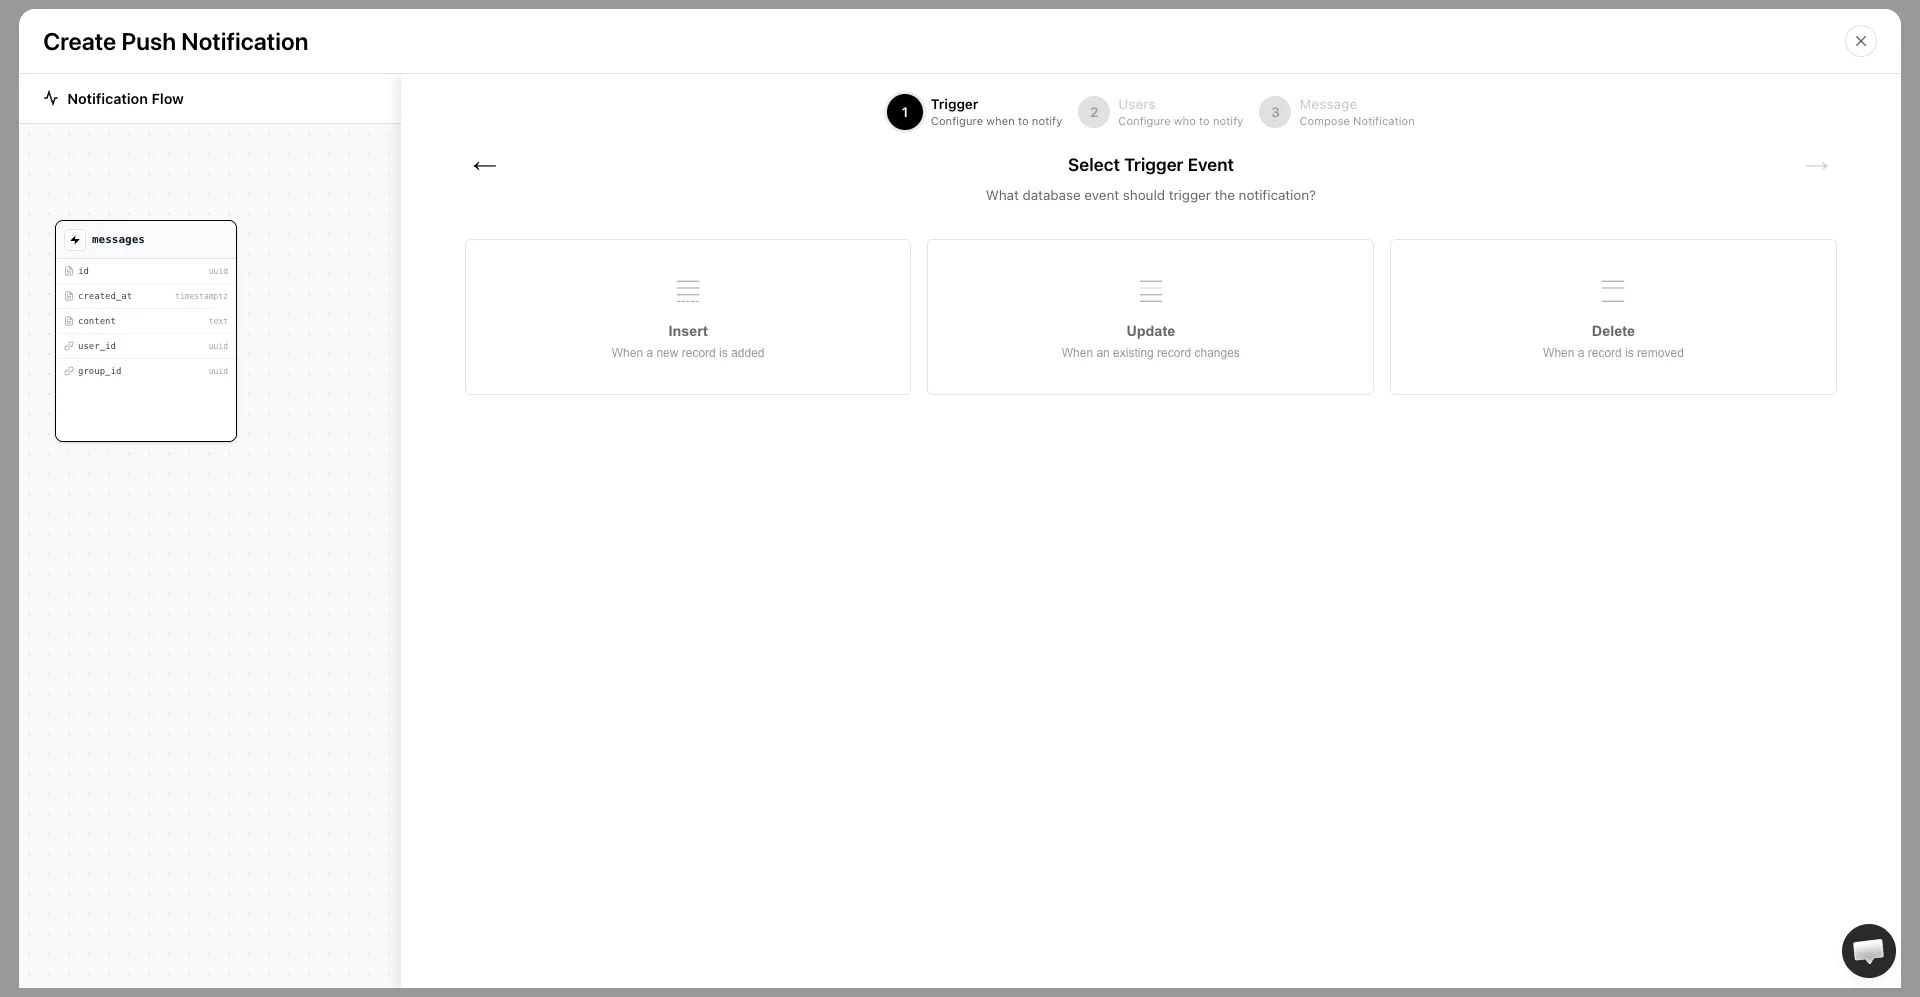
| Event | Fires when |
|---|---|
| Insert | A new row is added to the table |
| Update | An existing row is modified |
| Delete | A row is removed from the table |
Insert is the right choice for most notifications. Use Update when you need to react to a status change, for example when an order status changes to shipped.
3. Set conditions (optional)
Conditions answer the question: should Entrig process this event at all?
If no conditions are set, every event on the selected table fires the notification. Add conditions when you only want the notification to fire for certain rows.
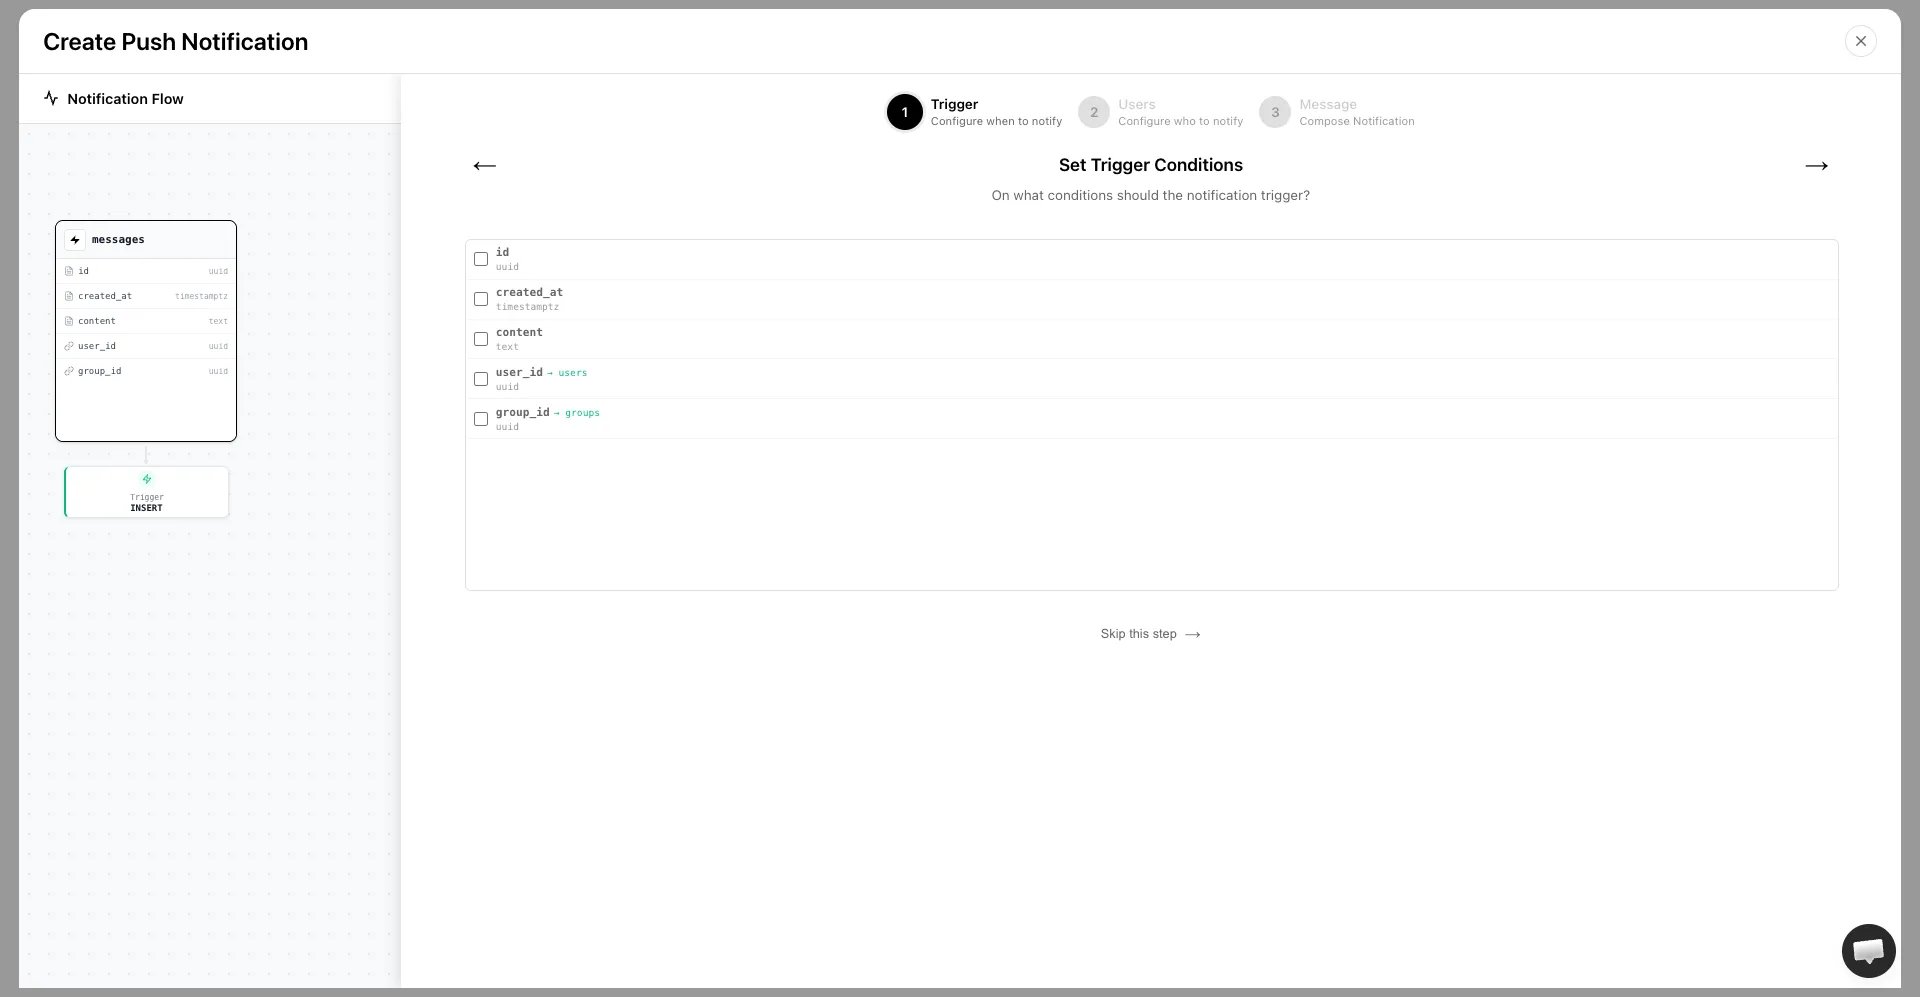
Check the columns you want to evaluate. For each one, choose an operator and enter a value:
statusequalscompleted: only process events where the row status is “completed”amountgreater than100: only process events where the amount exceeds 100
You can add multiple conditions. All of them must be true for Entrig to process the event.
For UPDATE events, conditions are evaluated against the new row values.
Once done, click Continue to move to the Users step.